Using Dicoogle
In this section, we will be taking advantage of our newly deployed instance of Dicoogle to index and search in a small repository of medical images. Throughout this page, make sure that Dicoogle is currently running in your machine (or deployed in a server).
Entering the Web Application
The web services are all served over the 8080 port by default. Let’s open the page http://localhost:8080. You should be greeted with this page.
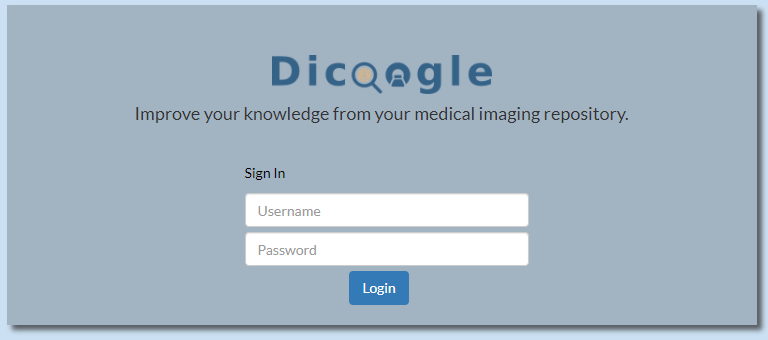
The default administration credentials are dicoogle for the username and, likewise, dicoogle for the password. Input these credentials to enter the main page.
Obtaining a repository
Before we continue, we need a medical imaging data set to work on. Any directory tree with files in the DICOM format will work. A small data set is available here, but many other free samples can be found online.
Retrieve one or more data sets and place them in a new folder where all our DICOM data will be kept. For this guide, we will create a “storage” folder inside “DicoogleDir”. So, we should have this directory tree:
 .
 ├── DicoogleDir
 ├── Plugins
 |   ├── ...
 |   ├── lucene.jar
 |   └── filestorage.jar
 ├── storage
 |   ├── «my-dicom-data»
 |   └── ...
 └── dicoogle.jar
Indexing a directory
Indexing a directory is done simply by accessing the Indexer page, on the side bar. In this page, there is a form that can be used to force Dicoogle to index the contents of a folder. For this example, we wish to index our data set by specifying its base directory. Dicoogle will recursively attempt to index all files in the folder, while traversing all folders within. Files that are not DICOM may be either ignored or trigger a warning, without further consequences.
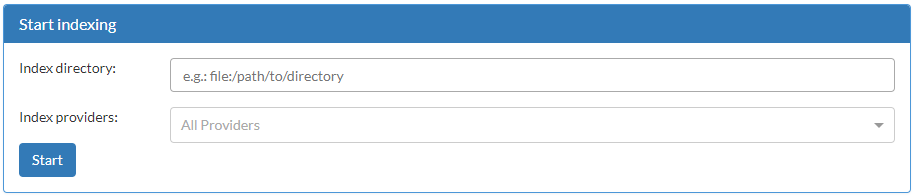
The “Index directory” field is a URI!
In Dicoogle, all DICOM instances (as in files) are associated to a Unique Resource Identifier (URI). With the local file system storage plugin, the URI of a file is, by default, the absolute path to that file with the file scheme. For example: file:/path/to/DicoogleDir/storage/001.dcm
The “Index directory” field is not a file system path!
You may feel tempted to copy the full dataset path from your file explorer into this field. However, in Windows, back slashes are used to separate items in the path (C:\DicoogleDir\storage\001.dcm), and the storage device is identified with a letter, followed by a colon (such as C:).
Windows file paths are not compatible with the URI format. When specifying a path, always use forward slashes (/) instead of back slashes (\). In addition, make sure that the URI includes the scheme file: as the prefix.
A new indexing task will be listed. Please note that, depending on how many files are in the storage folder, this process may take some time. Once complete, the progress bar will be at 100%, and the task can be closed by pressing the “Close” button. Although a “Stop” button is also provided, it is often not a good idea to cancel tasks prematurely.
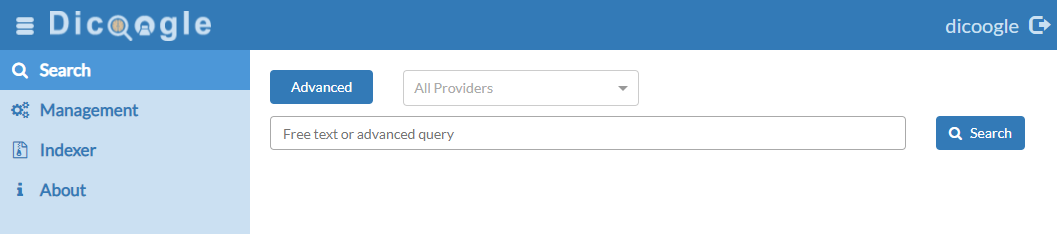
Using the Search Interface
The Search page enables users to execute queries over the indexed meta-data. It is also possible to select which providers to query. Query providers are actually query plugins. Since we only have lucene, this one will be used by default.
The query syntax is the same as Lucene’s, which supports free text searches. Let us search for all CT scans by typing “CT” in the query box and pressing Enter:
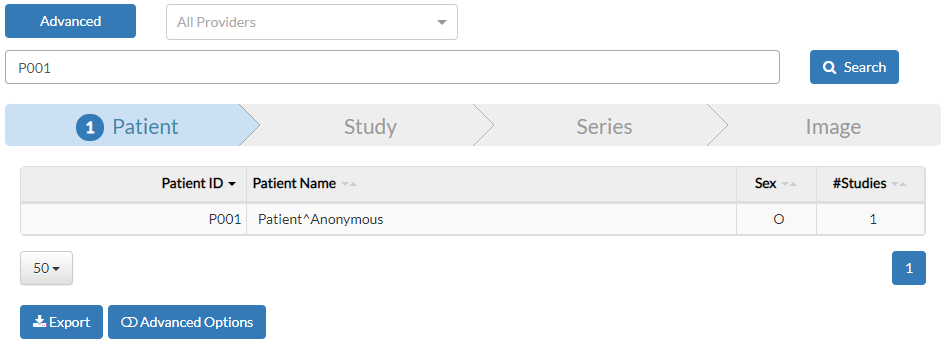
After running a query, the result browser shows up, giving the user an intuitive hierarchical view of the results. Results are navigated according to the DIM hierachy: first patients, then studies, then series, and finally the images.
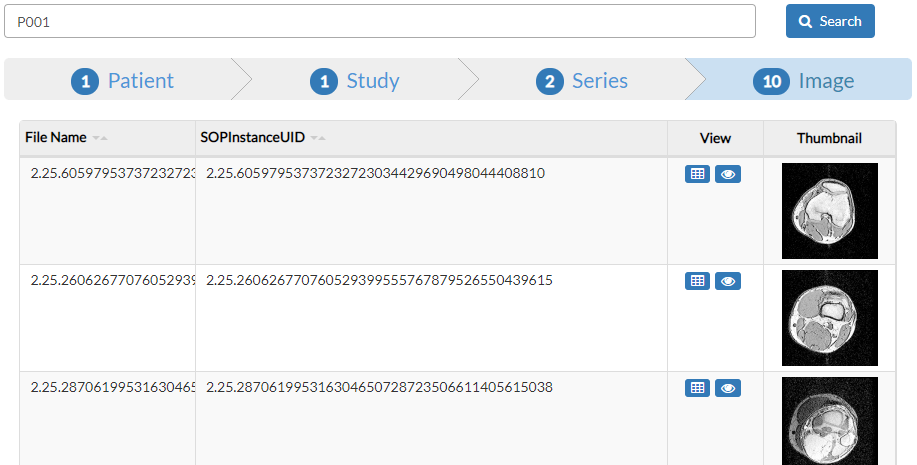
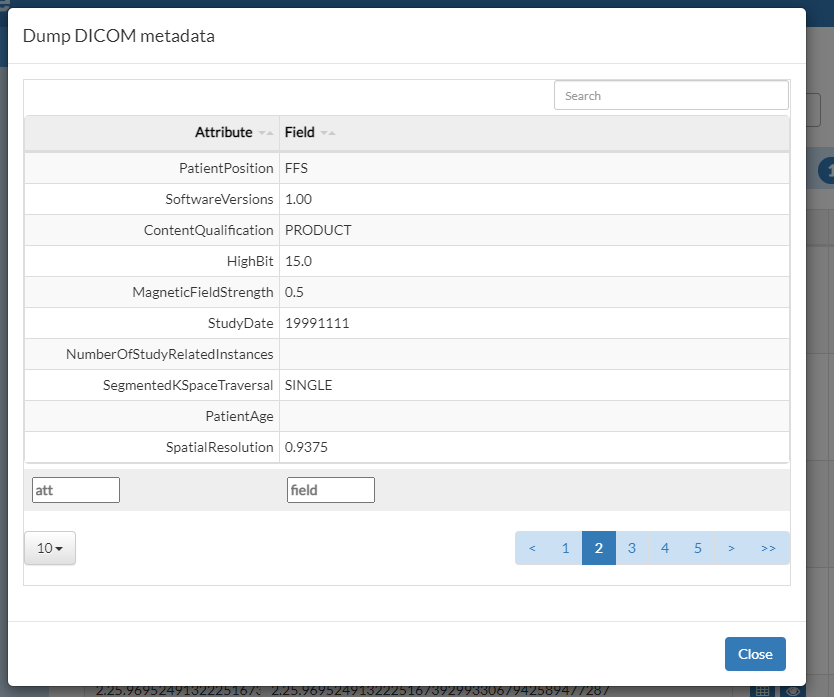
We can see the indexed meta-data of an image by pressing the dump button  .
.
It is also possible to see a larger preview of the image by pressing the eye button  or by clicking on the image thumbnail.
The image previewer is not a professional medical image viewer.
Medical images often have atypical visualization requirements, such as a larger colour bit depth than 8 bits, voxel-based 3D volumes, or even resolutions at the scale of several Giga-pixels. The built-in image previewer, on the other hand, is very limited and should not be used in professional activities such as screening. Such requirements can still be addressed with Dicoogle by extending it with professional tools.
Exporting Results
In this page, there is also an Export button, which is used to export the entire list of results into a comma-separated values (CSV) file. Once clicked, a new form is presented, where we need to specify which tags to consider in the CSV file. These are DICOM tag keywords, as specified in chapter 6 of the DICOM standard, PS3.6. The text input for the fields to export will automatically suggest DICOM attribute names as you type them in. For this example, we will request a few attributes:
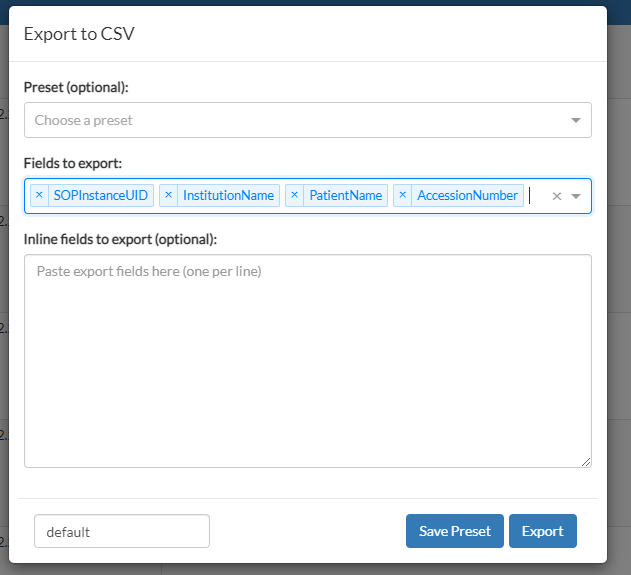
Now, you may click on the blue Export button, and the browser will download the resulting CSV file. If you intend to export results with the same list of fields, you can save the list as a preset for later use.
What else?
The remaining views of the web application are oriented to server configuration and monitoring, which will be covered in the next page. Moreover, extensions of Dicoogle may include web plugins, which extend the user interface with additional views.